Raspberry Pi
I have two Raspberry Pi's and I wanted to capture my configuration in order to get them setup for headless use.
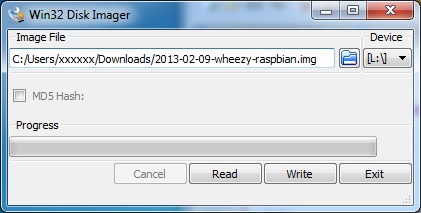
First, you need to install the image to a SDHC card. Using Win32DiskImager, write the wheezy image to the SD card.
Once complete, remove the card from your windows system
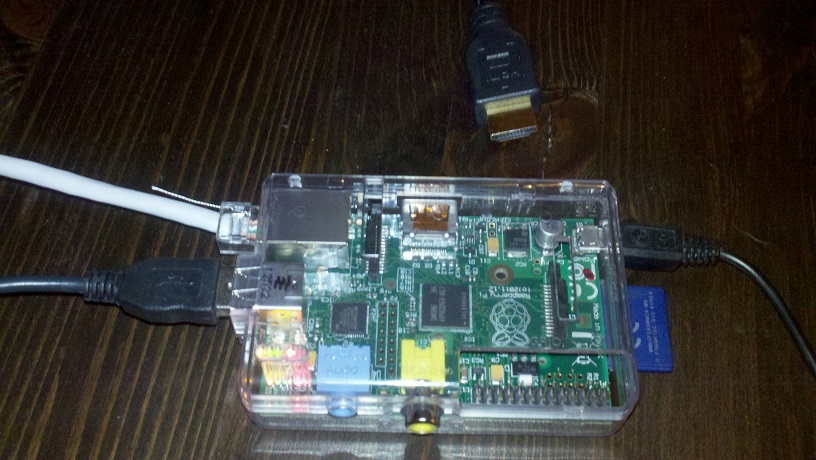
and prepare to power up your Raspberry Pi. Connect your Pi to an HDMI source (TV or monitor), connect an external USB keyboard/mouse, and connect an ethernet cable.
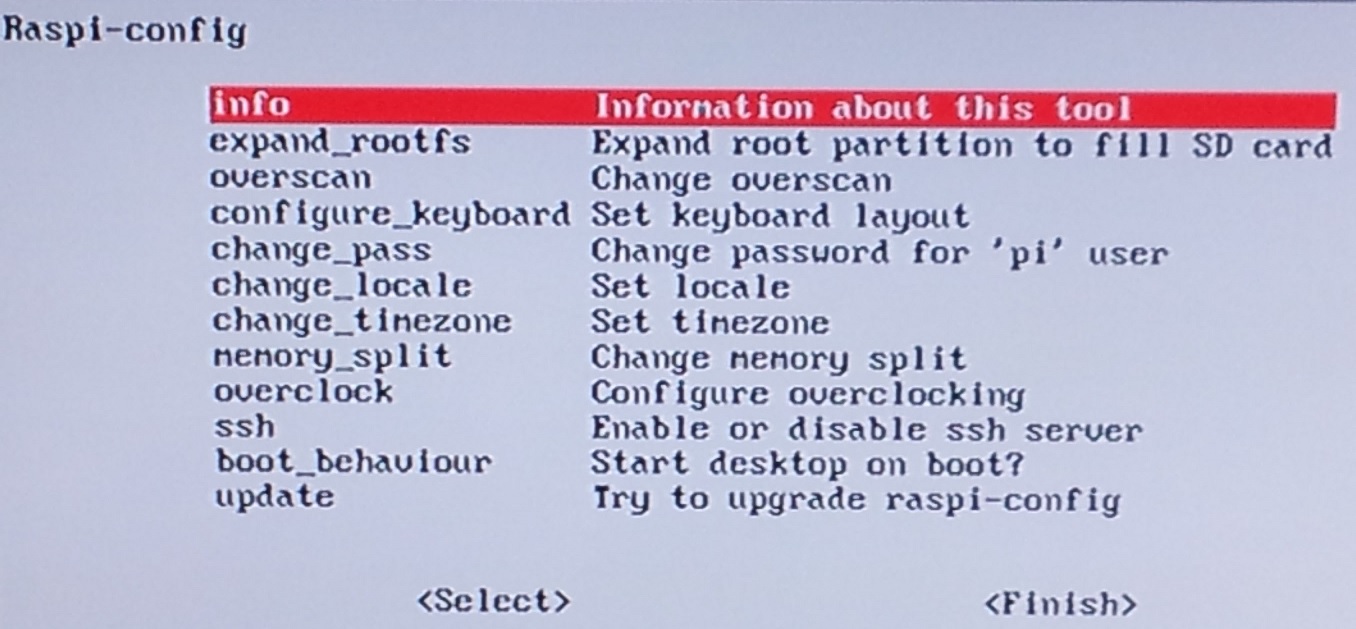
From the initial setup screen, you want to
- expand_rootfs
- change_pass
- change_timezone
- ssh
- boot_behavior
- Select <Finish> to reboot
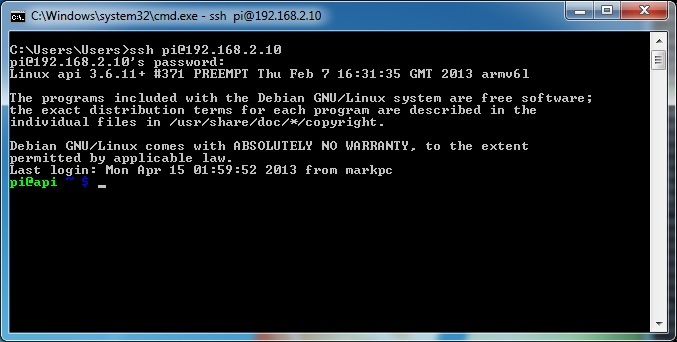
Once the computer has rebooted, you can either continue from the GUI or use a cmd shell (Ctrl-Alt-F2 to switch to a cmd shell).
We are now ready to configure your user account if you like. You could also just continue to use the pi account - your choice.
- (optional)sudo adduser username Whatever username you want
- (optional)sudo addgroup username sudo So you can sudo, which is definitely required!
- sudo vi /etc/hosts Edit this file to change the hostname (if you like)
- sudo vi /etc/hostname Edit this file to change the hostname (if you like)
- (optional)If you would like to set a static IP address
- (optional)sudo vi /etc/network/interaces
Replace: iface eth0 inet dhcp
iface eth0 inet static
	address 192.168.2.xxx
	netmask 255.255.255.0
	gateway 192.168.2.1
(optional)sudo ifup eth0 Bring up the interface.
(optional)sudo vi /etc/resolv.conf Verify that it shows your domain and nameserver for your network. My domain is 'main' with 192.168.2.1 as the nameserver.
	domain main
	search main
	nameserver 192.168.2.1
Remove the auto-login feature for the windowing manager. If you don't, it will always log in as the 'pi' user account
sudo vi /etc/lightdm/lightdm.conf Comment out autologin-user
#autologin-user=pi
At this point you've got the basic configuration out of the way, so go ahead and restart to let this all take effect.
sudo shutdown -r now
NOTE: Occassionally, your raspberry pi might suffer a disk error (slow flushing to the SDHC card prior to reboot) and the disk will be mounted as read-only (ro). The fix is simple enough, from a cmd window type
- sudo fsck /dev/mmcblk0p2
- sudo sync
Followed by
- sudo shutdown -r now
Which should fix your ro filesystem issues.
After logging in under your new user account, we can continue to setup the headless server.
- sudo apt-get install xvfb x11vnc daemon
- sudo x11vnc -storepasswd /etc/x11vnc.pass
- sudo vi /etc/lightdm/lightdm.conf
[SeatDefaults]
xserver-command=/etc/X11/xinit/xserverrc
sudo vi /etc/X11/xinit/xserverrc Set the screen resolution to whatever your like
#!/bin/sh
#exec /usr/bin/X -nolisten tcp "$@"
exec Xvfb :0 -screen 0 1280x768x16
sudo vi /etc/init.d/vnc_x11 Paste the below text into this file
#!/bin/sh
#
# /etc/init.d/vnc
#
### BEGIN INIT INFO
# Provides:          x11vnc
# Required-Start:    lightdm
# Should-Start:
# Required-Stop:
# Should-Stop:
# Default-Start:     2 3 4 5
# Default-Stop:      0 1 6
# Short-Description: X11 VNC Server
# Description:       Start or stop vnc server
### END INIT INFO

#INIT SCRIPT VARIABLES
SERVICE=$(basename $0)
PIDFILE="/var/run/${SERVICE}.pid"
BIN="/usr/bin/x11vnc "
#AUTH=`ps wwaux | grep '/X.*-auth' | grep -v grep | sed -e 's/^.*-auth *//' -e 's/ .*$//' | head -n 1`
AUTH="/var/run/lightdm/root/:0"
OPT="-xkb -auth ${AUTH} -rfbauth /etc/x11vnc.pass -forever -rfbport 5900 -o /var/log/x11vnc.log -loop"
CMD=${BIN}${OPT}

. /lib/lsb/init-functions

case "$1" in
    start)
		echo -n "Starting ${SERVICE}..."
		#/sbin/startproc ${CMD}
		daemon -X "${CMD}"
		sleep 2s
		;;
	stop)
		echo -n "Stopping ${SERVICE}..."
		PID=`ps -ef | grep x11vnc | grep -v grep | awk '{print $2}'`
		kill -9 ${PID}
		sleep 2s
		;;
	restart|force-reload)
		echo -n "Stopping ${SERVICE}..."
		PID=`ps -ef | grep x11vnc | grep -v grep | awk '{print $2}'`
		kill -9 ${PID}
		sleep 2s
		echo -n "Starting ${SERVICE}..."
		daemon -X "${CMD}"
		sleep 2s
		;;
    *)
    echo -e "Usage: ${SERVICE} {start | stop}"
    exit 1
    ;;
esac
After editing the file, then:
- sudo chmod 755 vnc_x11
- sudo /etc/init.d/vnc_x11 start To test out the file prior to doing the next step...
- sudo update-rc.d -f vnc_x11 defaults 92 This is set it to autorun on startup
Go ahead and unplug your video source, reboot, and try to connect via ssh and vnc - assuming all goes as planned, you should see a login prompt for both and you are done!

|